If woofers can be boxed in, ported and transmission lined, can the same be done with a tweeter? You betcha!
As it should be evident from looking at the installation book of the British van I built with Paul Richardson, I like modifying tweeters. This time, I would like to share the diagrams that I created for one of the most famous competitors in the circuit ever. These modifications are based on a Morel tweeter with a built-in aperiodic enclosure and a third magnet designed to short the magnetic field.
 |
| Illustration of original tweeter with aperiodic enclosure and double magnets shorted with a third magnet. |
Not satisfied with already having a tweeter with an actual fancy enclosure behind the dome, I had to push performance beyond the normal, if an aperiodic could be considered normal.
Over the years, I have come to trust the power handling ability and reliability of the larger Dynaudio and Morel dome tweeters. Focal tweeters have a smaller voice coil which limits how far you can push power handling. This is important when working on an enclosure that can't normally be reversed after being applied to an expensive tweeter.
My own home system tweeters use a small transmission line. As a result, their transparency is incredible. They just do not sound like the usually euphonic Dynaudios. Mine are much faster and transparent. They almost resemble ribbons. At times, it even seems as if the tweeters have completely turned off; a characteristic also noticeable when using the stupidly expensive diamond-dome Accutons.
But my transmission line is a little too long for a car. To gauge what I am attempting to describe, consider the fact that the Morels here described are already larger than most midrange speakers.
 |
| Modified tweeter with extended enclosure |
Carefully, I drill the back of the chamber making sure to not damage the magnets. A Unibit step drill comes in handy here. All drilling must be done slowly and with lots of sticky tape to try to prevent all metal shaving from going into the tweeter. In fact, I normally remove the dome and place a protective cover over the magnetic gap. I like using double sided tape that is flexible and very sticky.
Applying this protective tape is a little difficult with tweeters with ferrofluid with in the voice coil gap, but this never stopped me. I have been known to ask the factory for extra ferrofluid for after the surgery.
Yes, by now, your manufacturer's warranty is gone. As if this was not enough, you are doing the mods at your own risk as I am not doing them for you.
I look for a rigid tubular shape of approximately the same internal diameter as the inside chamber within the tweeter to extend the cavity. Aluminum pieces are always welcomed. This outside tube will have to be capped and adhered to the back of the tweeter. A slightly larger diameter is preferable to a smaller one to prevent the creation of a highly diffractive edge midway through the final cavity.
How you do this portion of the project will depend of the circumstances and your imagination. The only thing that is most important is that the connection between cavity and tweeter must be as rigid as possible. A vibrating rear extension will defeat the point of the exercise.
 |
| Better Transparency |
The whole idea behind this mod is that normal tweeters create rear pressures that hit the solid components behind the dome and then return and actually cross the dome to become audible. These distortions thus exhibit a lag in time and are asynchronous with the music. Typically, the lower the mass of the dome, the more susceptible the tweeter is to this effect. With a chamber that prevents much of this reflected pressure from making it back to the dome, the tweeter is left playing sound in response to voice coil impulses only; which is how it is supposed to operate. In a nutshell, the sound is very transparent after this modification. The only caveats are that this mod is not for first timers and that experimentation is acceptable. Without enough experience altering speakers, you may destroy your first expensive pair.
Moreover, I have tried to model the right levels of felt and volume of additional cavity by using the same formulas as with woofers but the results are unreliable. The main reason why is that the dimensions associated with this exercise are much smaller than when dealing with woofers. So, I have learned to trust experimentation as a way to fine-tune the components. Again, if in doubt, don't start the project.
I hope that you have found the idea useful. If you do not get the urge to modify a tweeter, at least you now know that you can treat them like you would other larger woofers.
 |
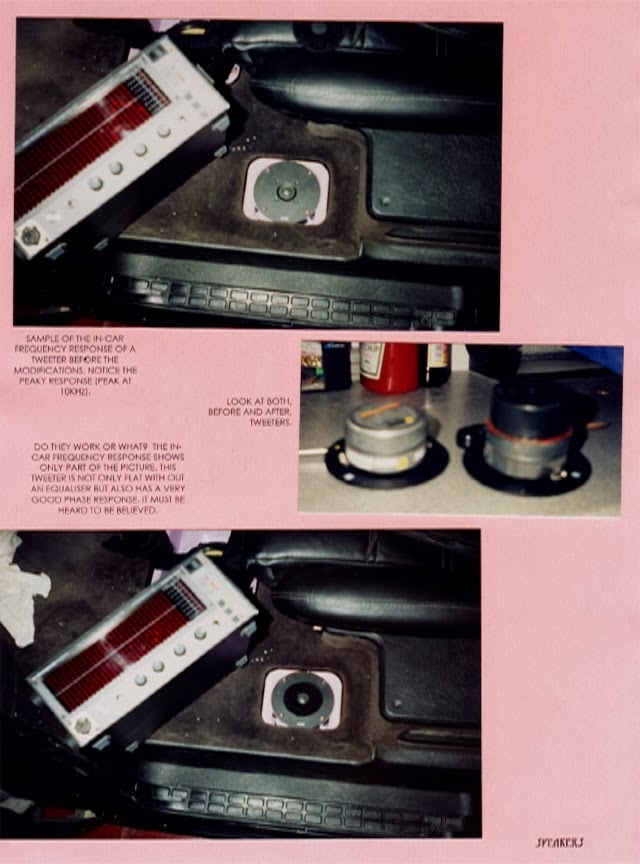
| Modifying a tweeter; circa 1996 |
 |
| Testing the outcome |
No comments:
Post a Comment